How to add a second extension on MicroSIP
Jump to navigation
Jump to search
Causes
Solutions
To access the configuration parameters, follow next steps:
- Click the drop-down menu to access the options menu.
- Select Add Account.
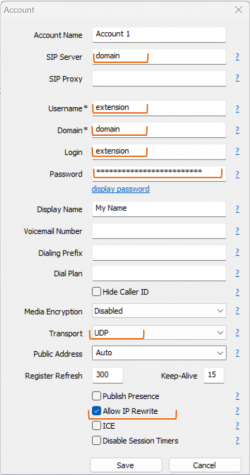
- Fill out the login information as follows:
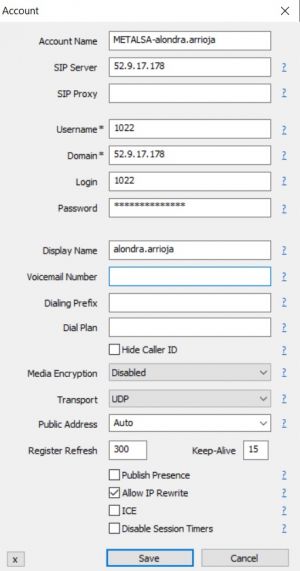
Account Name= "Name of your project"-"Your softtek email without domain" E.g Frontier-pedro.pascalSIP Server= Domain*Username= Extension*Domain= Domain*Login= Extension*Password= Extension Password or Secret*Display Name= Your softtek email without domain E.g pedro.pascal- In the Transport field, select
UDP. - Check the
Allow IP Rewritecheckbox. - *Domain, Extension an Extension Password received in an email from Call Manager Support Team.

- E.g

- Note:
If you are connecting from a country different of USA or Mexico, changed the next values: "Keep-Alive" = 9 and "Register Refresh" = 150.
If your problem persist
If you are unable to get the configuration working, please contact us at itis.cmsupport@softtek.com. To help us resolve this quickly, please include:
- -Your Public IPv4: (Found at https://checkip.amazonaws.com/)
- -Screenshot of Settings:
Ctrl+P
- -Screenshot of Account:
Ctrl+M
- -Issue Description: A brief summary of the problem you are facing.
