MicroSIP Setup Manual: Difference between revisions
Jump to navigation
Jump to search

No edit summary |
No edit summary |
||
| Line 34: | Line 34: | ||
#:<code>Password</code> = Ext Password or Secret** | #:<code>Password</code> = Ext Password or Secret** | ||
#:<code>Display name</code> = Your Name** | #:<code>Display name</code> = Your Name** | ||
#:In the Transport field, select <code>UDP</code>. | |||
#:Check the <code>Allow IP Rewrite</code> checkbox. | |||
[[Category:MicroSIP]] | [[Category:MicroSIP]] | ||
Revision as of 20:41, 30 November 2023
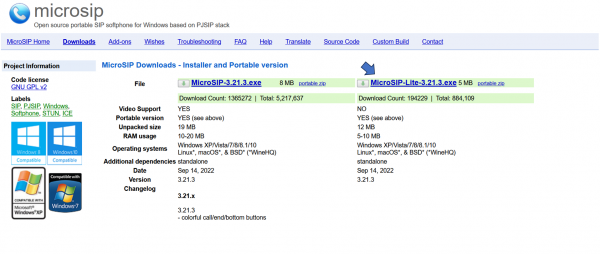
Download
https://www.microsip.org/download/MicroSIP-Lite-3.21.3.exe

Details
- RAM usage
- 10-20 MB
- Operating systems
- Windows XP/Vista/7/8/8.1/10, Linux*, macOS*, & BSD* (*WineHQ)
- App License
- Open Source (GPL v2)
- Source
- MicroSIP Lite
- MicroSIP Portable can run from a cloud folder, external drive, or local folder without installing into Windows. https://www.microsip.org/download/
- Note
- MicroSIP does not require the installation of additional libraries, runtimes or frameworks
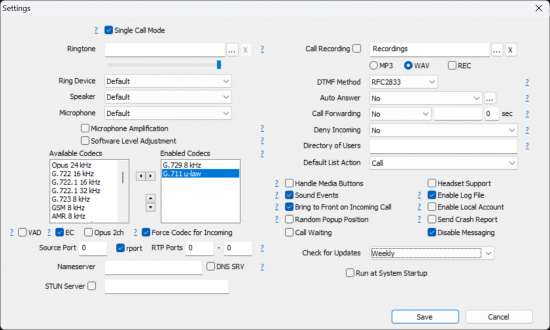
Settings
To access the configuration parameters, follow next steps:
- Click the drop-down menu to access the options menu.
- Select Settings
(Ctrl+P). - Define the settings as shown in the following screenshot.
Add Account
Once you've configured the app's settings, you'll need to add your Microsip account:
- Click the drop-down menu to access the options menu.
- Select Add Account.
- Fill out the login information as follows:
Account Name= Name of your project.SIP Server= Domain**User Name= Extension**Domain= Domain**Login= Extension**Password= Ext Password or Secret**Display name= Your Name**- In the Transport field, select
UDP. - Check the
Allow IP Rewritecheckbox.

